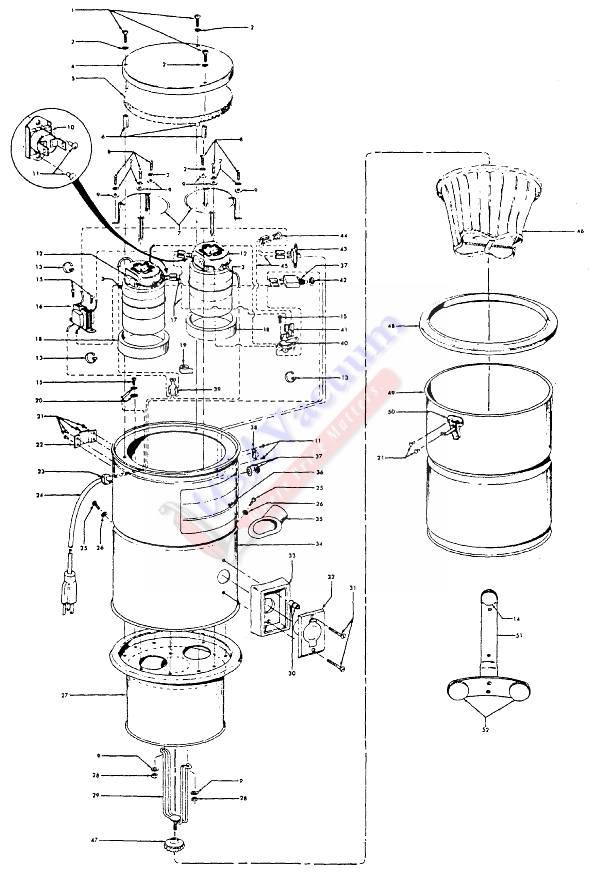
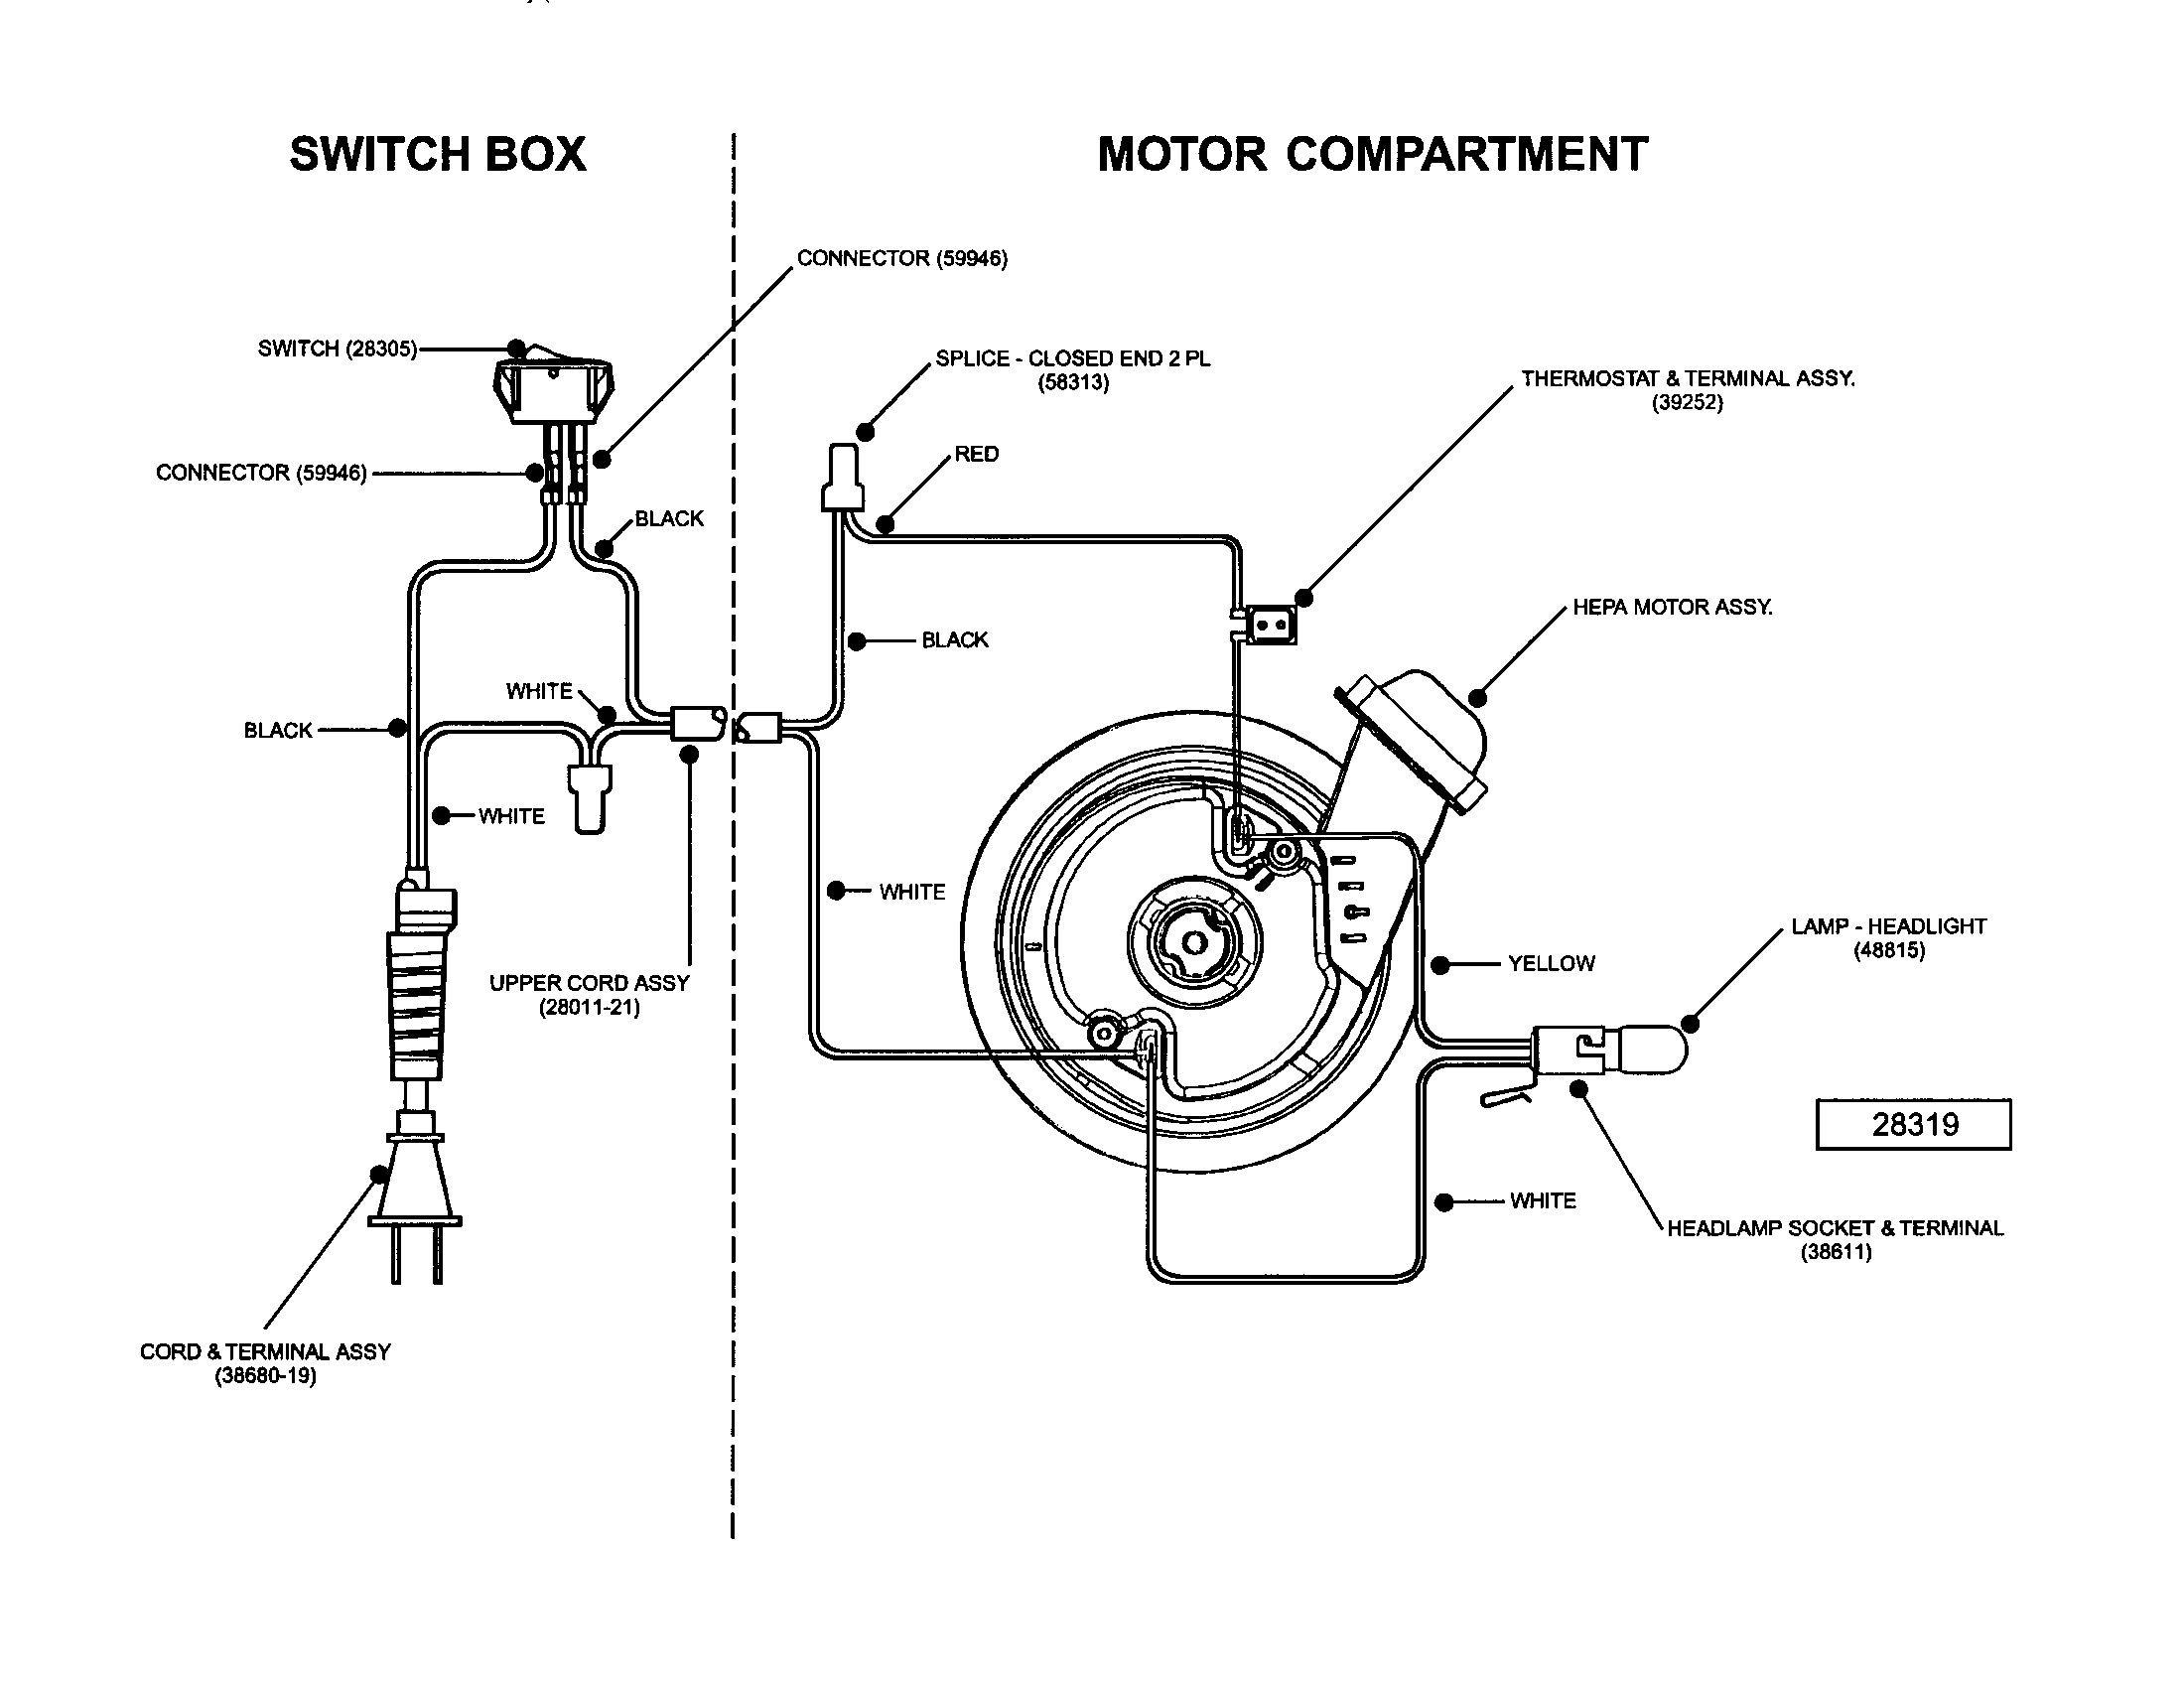
Hoover Central Vacuum Wiring Diagram Wiring Diagram
CENTRAL®VAC BRAND BUILT-IN VACUUM SYSTEMS PO Box 259 T (800) 666-3133 23455 Hellman Ave. www.centralvac.com. and construction debris - Wear Safety Glasses. l Be careful when drilling to check for electrical wiring and plumbing. l Check your local Building Code for any regulations governing any of the phases of your installation.
beam vacuum wiring diagram
Call Now For Central Vac Live Support & Order Entry. Get Free Shipping & The Best Prices! We sell Electrolux, Nutone, Beam, Cana-Vac, Hayden, Galaxie and many more brands.

Central Vacuum Installation & Service CJ's Electric Bentonville
A central vacuum system (CVS), also known as a built-in vacuum or whole-house vacuum, uses a series of tubes installed within the walls of a home or building to remove dirt, dust and debris.
Wiring A Central Vacuum
Supervalve wiring instructions Page 14-15 Step 6: Install the tubing Page 16-18 Step 7: Install the power unit Page 18-19 Central Vacuum Fittings Page 20 Safety Instructions and Grounding Instructions Page 21-22 TOOLS NEEDED FOR INSTALLATION HELPFUL HINTS FOR INSTALLATION o Use a tubing cutter for cleaner cuts.

Central Vac Wiring Diagram For Your Needs
1. From the description: shorted between the powerhead and the plate reading closed, and disconnected between there and the other wall plates. Probably, but not definitely, the same location. Restating due to comment: Somewhere in the wiring that runs between the powerhead and the outlet that you read as closed, the wires to/from those end.

Central Vacuum System What is it & How Does It Work?
Step 2 - Run Wires. You will need to locate the outlets on either the walls or floors of the rooms, for both the piping and the wiring. You can only set up controls for a given number of outlets so make sure you plan accordingly. The best place is in the floor, but if you need to use a wall, place the outlet for the vacuum as low as possible.

Central Vacuum Wiring Schematic Free Wiring Diagram
Finding Studs. Utilize a stud finder to locate the studs in your wall. This is essential for ensuring that the vacuum outlet is securely anchored. 2. Using Stud Finder Tool. Move the stud finder slowly across the wall where you plan to install the outlet. Mark the edges of the studs with a pencil for reference. 3.

I was wanting to know how to wire my central vacuum system. Can I run
When you insert the hose into the inlet, the connector pins touch metal plates on the hose end and signal the central vacuum motor to start. The low voltage signal wires connect to the inlet valve by small screws on the back of the inlet. The Universal CV inlet will mount to the CV mounting bracket (another installation component that mounts.

Central Vacuum Wiring Schematic Free Wiring Diagram
Central Vacuum Online is your 10-year trusted store for parts for MD vacuum. Shop parts for MD vacuum with the name households trust: Central Vacuum Online!
Hoover Central Vacuum Wiring Diagram Wiring Diagram
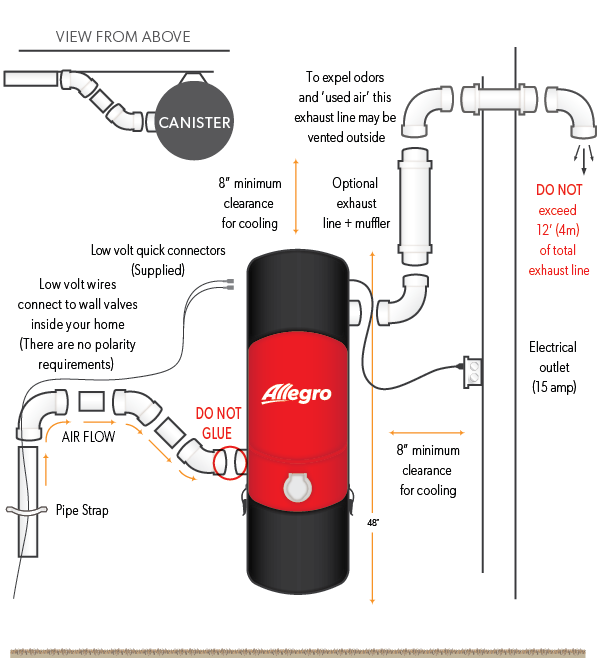
A power unit must be connected to all fittings. Allow 5/8″ of tubing to fit in the elbow collar and cut the trunk line to fit into the 90-degree elbow. Place the elbow on the trunk line with the intake access hole. Make sure all joints are tight once you have aligned all fittings and tubes for maximum airflow.

277 vac wiring
Review this manual before installing the central vacuum system CENTRAL VACUUM SYSTEMS Dynovac Industries 1 800 226 1221 1 403 346 4877 #1, 6841 52 Avenue. ducts, plumbing lines, electrical wiring and other obstructions which might hinder installation. Plan ahead! Planning the built-in system Determine location for power unit. The power unit.

Bestio Central Vac Low Voltage Wiring Diagram
ElectraValve Finishing. After the walls are painted install the cover plate. Snap the romex into the cover plate. Connect the low voltage wire to the two contact screws. (The system is activated using the house current in the romex.) As the cover is inserted, gently tuck in the wires.
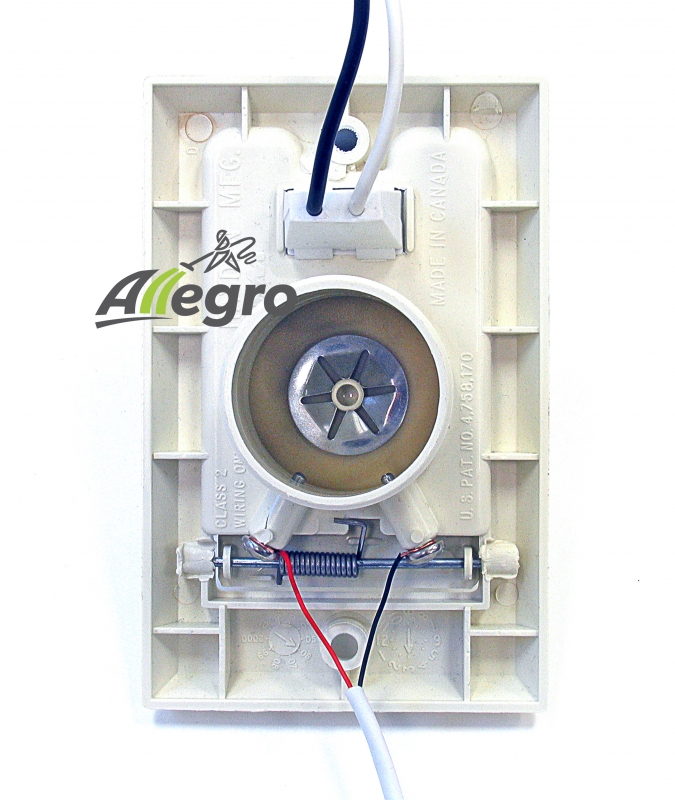
Allegro central vacuum Electrified Wall Inlet Valve
Flip the switch on the end of the hose and it will both turn on the remote Power Unit (via the low voltage wire) and the electric beater brush (via the hose as described above). The suction from the remote Power Unit pulls through the piping system, the hose and the attachment to safely and effectively remove unwanted dust and debris from the.

MD Central Vacuum Power Unit Mounting Instructions
Find central vacuum installers near me to learn more about central vac wiring instructions and find a cheap central vacuum! PRICE MATCH GUARANTEE | FREE SHIPPING ON ORDERS OVER $50*. Then, run wiring along the branch lines from the inlet lines to the trunk line. Also, secure this wiring with electrical tape. At the joint of the inlet line.
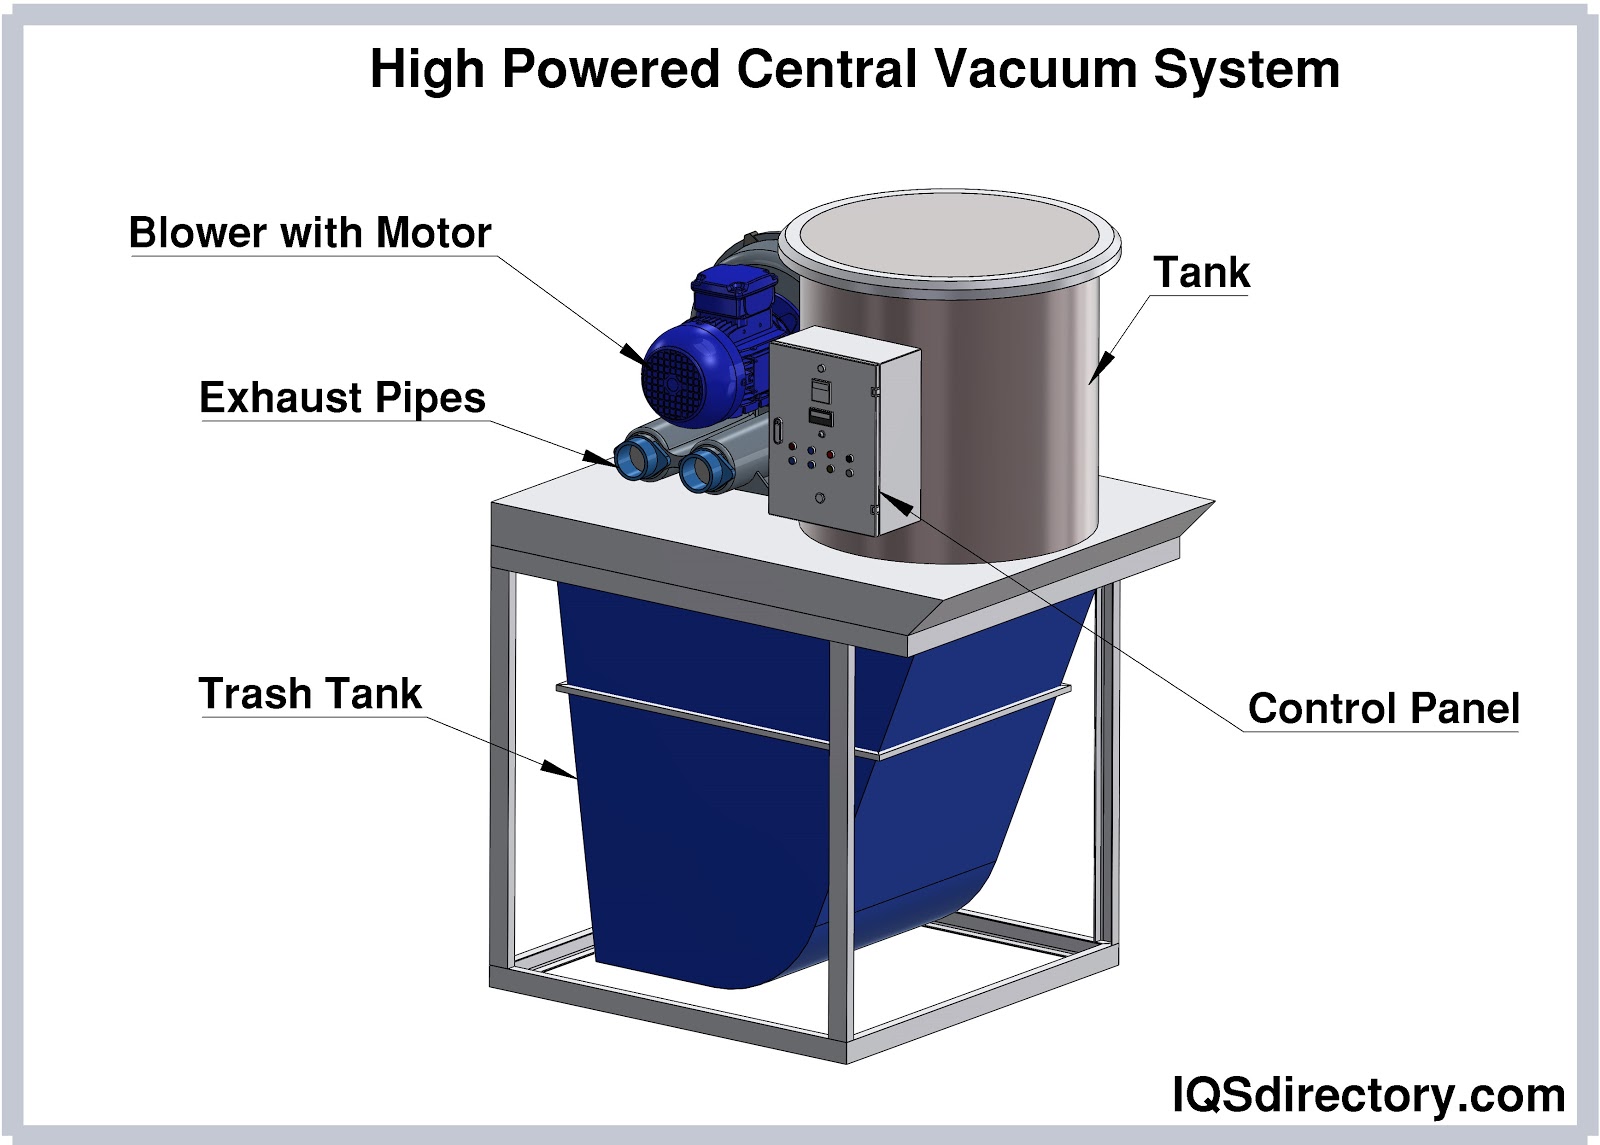
Central Vacuum System What is it & How Does It Work?
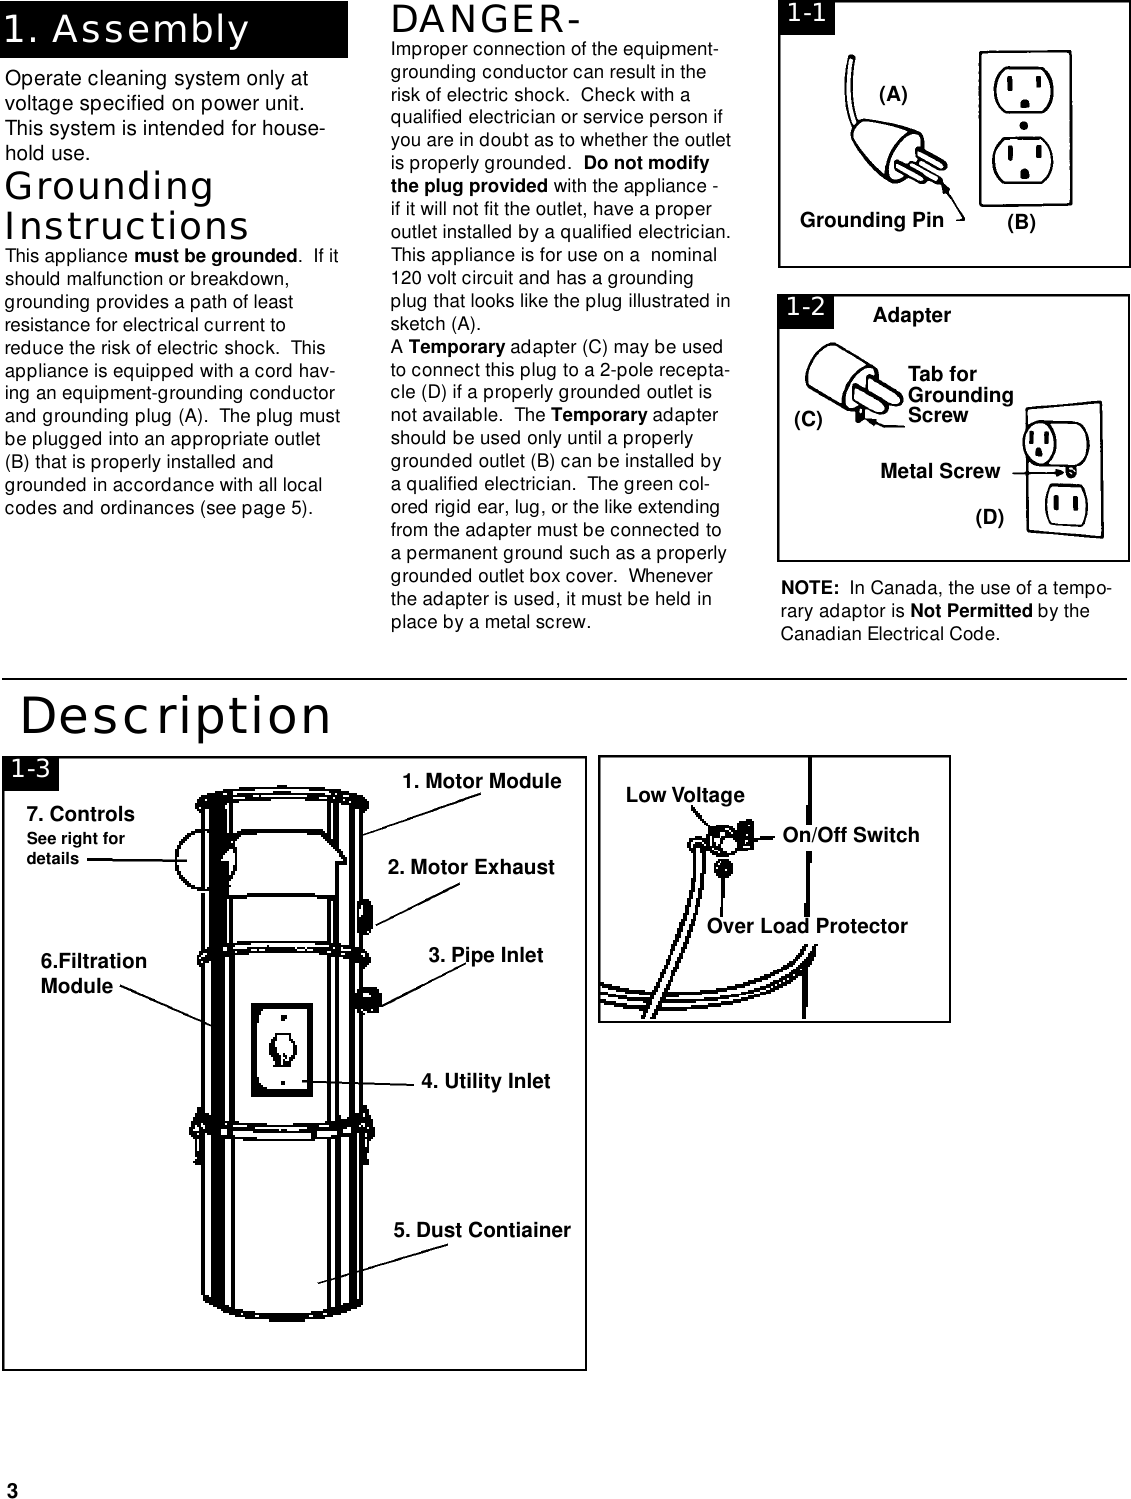
Step-by-Step Wiring Instructions. Prepare the Vacuum Unit: Locate the electrical connection panel on your central vacuum unit. Remove the Cover: Unscrew and remove the cover to expose the wiring terminals. Strip the Wires: If not already done, strip the ends of the wires from your power source to expose the bare wire.

277 vac wiring diagram
Begin the installation of a central vacuum system by mounting the power unit to a wall. Though methods may vary according to the make and model, the following instructions show you the basic techniques. Use 2 1/2-inch-long screws to mount the plate to the wall; be sure to drive the screws securely into a wall stud.